ICFPro.ca is a division of ICFhome Ontario - Direct Line 1 705 533-1633 - Email: info@icfpro.ca
ICF Installation

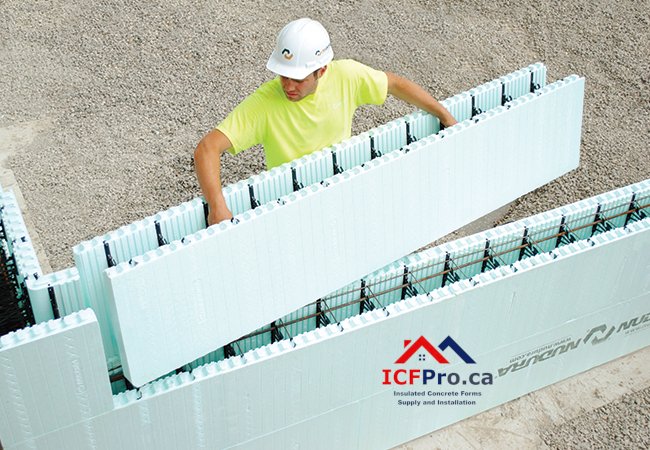
ICFpro.ca · Detailed Installation Methodology
ICF Installation: The Step-by-Step Process for Ontario Builders 2026
ICF installation isn’t difficult, but it’s sequence-critical — mistakes early in the process compound through the rest of the build. This guide walks through the complete installation process from excavation to backfill in Ontario conditions, with the Canadian specs, CSA standards, 2024 OBC compliance points, cold-weather considerations, and real crew composition that actually apply on Ontario job sites. After 30 years of pouring ICF in Ontario (since 1995, 300+ projects), here’s the methodology — not the marketing version.
Step-by-Step Process
8 Major Phases
CSA A23.1/A23.3/G30.18
2024 OBC Compliant
Ontario Cold-Weather Ready
The installation process in 30 seconds
ICF installation runs 8 major phases over 1-2 weeks on site for a typical Ontario basement. Sequence matters more than speed — the first course sets the entire wall’s success, and the concrete pour is the moment of truth for everything you’ve set up.
- Phase 1: Site preparation and excavation (1-2 days) — remove organic material, achieve correct depth, prep for footings
- Phase 2: Footings (1-2 days) — pour reinforced concrete footings with vertical dowels for ICF wall connection
- Phase 3: First course of ICF blocks (1 day) — the most critical alignment step in the entire process
- Phase 4: Subsequent courses, bucks, and bracing (2-3 days) — running bond pattern, window/door frames, alignment bracing
- Phase 5: Reinforcement placement (concurrent with stacking) — 15M vertical and horizontal rebar per CSA A23.3
- Phase 6: Concrete pour (1 day) — pumped in 4′ (1.2m) lifts, vibrated, monitored for wall alignment
- Phase 7: Embedments and floor integration (varies) — anchor bolts, floor joist hangers, mechanical sleeves
- Phase 8: Bracing removal, waterproofing, backfill, slab (3-4 days) — the finish work that protects everything you just built
8 phases
Installation sequence for a complete ICF basement build
1–2 weeks
On-site duration typical Ontario residential basement
3–5 crew
Typical crew size 1-2 lead + 2-3 general for residential basement
4′ lifts
Concrete pour rule 1.2m lifts to manage hydrostatic pressure
What ICF Installation Actually Involves
ICF installation is the on-site assembly process for an Insulated Concrete Form wall system. It combines elements of formwork construction (assembling the foam blocks), structural concrete placement (pouring reinforced concrete), and integrated insulation (the foam stays in place permanently as the wall’s insulation layer). For a typical Ontario residential basement, the process runs 1-2 weeks on site, follows a clear 8-phase sequence, and requires 3-5 crew members — typically 1-2 ICF lead installers plus 2-3 general construction labourers.
Compared to traditional concrete formwork (which requires building forms, pouring, stripping forms, and then separately installing insulation), ICF installation collapses multiple steps into one integrated trade visit. The forms don’t come off after the pour — they become the wall’s permanent insulation layer.
What ICF installation is NOT
- Not a DIY project at scale — small repair or auxiliary work can be DIY-friendly, but a full residential foundation install requires experience with concrete sequencing, bracing systems, and structural reinforcement
- Not the same as wood-frame construction — the structural pour is the moment of truth; you don’t get to fix mistakes after the concrete cures
- Not a single-trade visit for the entire build — foundation install is one phase; if you’re continuing ICF above grade, that’s a separate sequence
For broader context on what ICF building delivers as a system, see our complete ICF building primer. For foundation-specific application detail, see our ICF foundation guide. This article focuses specifically on the installation methodology.
Site Preparation and Excavation
1
Site Preparation & Excavation 1-2 days
The starting point is everything. A poorly-prepared site produces a poor foundation regardless of how carefully the rest of the install proceeds.
What happens:
- Final site survey — setbacks confirmed, building corners staked, utility locates verified
- Excavation — remove organic material (topsoil, roots, debris) from the building footprint and a working margin around the perimeter (typically 1m beyond foundation lines for working space)
- Achieve correct depth — top of footing typically 1.4-1.5m below finished grade in central Simcoe County, deeper in snow belt areas. OBC minimum frost depth is 1.2m but local municipalities require deeper based on regional conditions
- Ontario frost depth by region: Central Ontario (Barrie, Peterborough, Kingston) 1.2-1.4m; Georgian Bay snow belt (Collingwood, Wasaga, Tiny, Penetanguishene) 1.4-1.5m; Ottawa Valley 1.4-1.5m; Northern Ontario 1.5-1.8m
- Bottom of excavation graded level and compacted — geotechnical inspection if required by engineer or municipality
- Drain rock placed where weeping tile will sit; sump pit prep if applicable
What can go wrong:
- Excavation not deep enough — frost heave risk over 30+ year service life
- Insufficient working margin — cramped crew movement during install
- Organic material left in place — settlement risk under footings
- Drainage not prepared — water management problems compound through the project
Footings
2
Footings 1-2 days
Footings transfer building loads to the soil and provide the level base for the ICF wall to start on. They must be wide enough to distribute loads and reinforced enough to span minor soil irregularities.
What happens:
- Footing forms set — typically 400mm wide × 200mm deep for an 8″ ICF wall (per OBC Part 9 tables or engineer specification)
- Footing reinforcement — 15M longitudinal bars (typically 2-3 bars depending on footing width), 10M ties at corners. Reinforcement per CSA A23.3 for engineered designs.
- Vertical dowels for ICF wall connection set at the correct spacing matching the wall’s vertical rebar schedule — typically 15M at 600mm o.c., extending approximately 600mm above the top of footing
- Concrete pour — 20-25 MPa typical residential per CSA A23.1 (often 25 MPa for footings to allow earlier loading). Air-entrained 5-8% for freeze-thaw resistance.
- Level critical — achieve within 6mm (1/4″) of level across the footing surface. Out-of-level footings make the entire wall stacking sequence harder.
- Cure period — 24-48 hours before wall stacking begins; longer in cold weather
- Radon stub installation — new 2024 OBC requirement for all new homes; sub-floor depressurization pipe installed at this stage in some sequences (or with slab pour, depending on builder)
What to verify:
- Footing dimensions match wall thickness specification (wider for larger ICF cores)
- Dowel spacing matches the wall’s vertical rebar schedule exactly — mismatches mean field bending or splicing
- Dowel length adequate for proper lap with wall vertical rebar (typically 600mm minimum lap)
- Footings square to design layout — minor squareness errors compound over the wall stack
First Course of ICF Blocks
3
First Course of ICF Blocks 1 day
The most critical course of the entire wall. Everything stacked above the first course inherits its alignment, level, and squareness. Spend extra time here.
What happens:
- Corner blocks first — place all corner blocks at the four corners (or more for complex floor plans), aligned to chalk lines on the footing
- String lines — pulled corner-to-corner to define wall lines for placing intermediate blocks
- Straight blocks — laid working from each corner toward the centre of each wall segment, with vertical dowels passing through the corresponding webs
- Level adjustment — shims placed beneath blocks to bring the first course to consistent level; some installers use mortar bed leveling for footings that are out by more than 13mm
- Connection — some installers use zip ties or rebar tie wire to pull blocks snugly together at the seams; major brands have interlock that handles this without ties if properly placed
- Verify square — measure diagonals corner-to-corner; should match within 6mm for a typical residential rectangular footprint
- Horizontal rebar — place 15M horizontal bars in the designated clips at the top of the internal webs (per CSA G30.18 designation)
Why this course is critical:
- Any out-of-square error compounds upward through all subsequent courses
- Out-of-level errors require corrective shims or rip cuts that slow the whole install
- Misaligned dowels mean rebar can’t pass cleanly through web slots without bending
- Spending an extra hour here saves a day later
Subsequent Courses, Bucks, and Bracing
4
Subsequent Courses, Bucks, and Bracing 2-3 days
After the first course is set, the wall builds up quickly — if you stay disciplined about running bond, opening detailing, and bracing.
What happens:
- Running bond pattern — reverse the orientation of corner blocks on the second course so seams don’t line up vertically; same pattern for all subsequent courses. This is what gives ICF walls their inherent structural strength against shear loads.
- Level check every 2-3 courses — small errors accumulate; verify with a long level or laser before they compound
- Window and door bucks — install wood or metal frames into openings as the wall rises. Bucks must be plumb, square, and sized to the window/door manufacturer’s rough opening. Concrete bonds to the buck during the pour, so the buck stays in place permanently.
- Service penetrations — electrical conduits, plumbing penetrations, HVAC sleeves, mechanical openings — all installed during stacking before concrete pour. Post-pour penetrations require concrete coring and are significantly more expensive.
- Bracing installation — steel or wood bracing every 1.2m (4′) along the wall perimeter, with adjustable turnbuckles for plumbing the wall. Bracing must be plumbed perfectly before the pour — the wall will follow whatever the bracing says.
- Lintel preparation — for spans exceeding OBC Part 9 prescriptive limits, engineered lintel design with additional rebar and proper concrete cover. See our ICF lintel design guide for details.
- Top course — the final course uses taper-top blocks that prevent concrete intrusion into the interlock and produce a level wall top for sill plate installation
Bracing is non-negotiable: Hydrostatic pressure of poured concrete will push out improperly-braced walls. A 9 ft (2.7m) wall pour exerts up to roughly 1,400 kg/m² (300 psf) lateral pressure at the base. Bracing must be solid and adjustable to plumb. Skipping or under-bracing is the #1 cause of ICF wall blow-outs.
Reinforcement Placement
5
Reinforcement Placement Concurrent with stacking
Steel reinforcement isn’t a separate phase — it’s placed as the wall stacks. But the spec details are critical for structural performance.
Canadian rebar designations (CSA G30.18):
| Designation | Diameter | Typical Use in ICF Walls |
|---|---|---|
| 10M | 11.3 mm | Ties, secondary steel, light reinforcement |
| 15M | 16.0 mm | Primary vertical and horizontal reinforcement — the workhorse |
| 20M | 19.5 mm | Engineered designs, walkout lintels, heavy load applications |
| 25M | 25.2 mm | Commercial / multi-storey / heavy structural |
Standard Ontario residential ICF reinforcement:
- Vertical bars — 15M @ 600mm (24″) o.c., lapped into footing dowels and continuous to wall top
- Horizontal bars — 15M @ 400mm (16″) o.c. vertically (typically every second course of an 18″-high block)
- Additional reinforcement at openings — 2-3 bars above and below windows and doors, plus diagonal corner bars at openings
- Corner reinforcement — bent corner bars overlapping vertical bars from each wall direction, providing continuity around the corner
- Concrete cover — 40mm minimum from rebar surface to concrete face per CSA A23.1 (important for lintel design too)
- Splice lengths — minimum 600mm lap between rebar segments per CSA A23.3
For engineered designs (walkouts, taller walls, unusual conditions, multi-storey), a structural engineer specifies the exact reinforcement schedule per CSA A23.3. For prescriptive Part 9 designs (most residential), OBC tables specify the reinforcement based on soil retention height. See our complete 2024 OBC guide.
The Concrete Pour
6
The Concrete Pour 1 day (4-6 hours of pour)
The moment of truth. Everything you’ve set up in steps 1-5 either works or doesn’t at this point. A well-prepared wall poured properly is uneventful. A poorly-prepared wall poured aggressively can blow out the foam, deflect, or honeycomb.
Pre-pour checklist:
- All bracing verified plumb and locked
- Rebar in correct positions, with proper laps and corner ties
- Window and door bucks properly braced internally to resist concrete pressure
- Service penetrations all in place
- Anchor bolts laid out at top of wall for sill plate connections
- Pump truck access confirmed, pump truck size appropriate for site (boom or line pump)
- Concrete truck schedule confirmed with supplier (3-4 trucks for typical residential basement)
Concrete specs (CSA A23.1 standard):
- Strength: 25-30 MPa typical for residential ICF walls (above OBC Part 9 minimum of 20 MPa)
- Slump: 150-200mm — flowable enough to fill the form without honeycombing, not so wet that hydrostatic pressure deforms the foam
- Aggregate size: 10-14mm — matches the form cavity geometry without bridging at rebar locations
- Air entrainment: 5-8% for freeze-thaw resistance
Pour sequence:
- Start at corners — pour from corners working outward, ensures clean fill at the most structurally critical points
- Lift sequence — pour in 1.2m (4′) lifts, not full height continuously. Allow brief pause between lifts to let lower lift begin set. This manages hydrostatic pressure.
- Vibration — light internal vibration (pencil vibrators) ensures concrete fills around rebar and around openings without honeycombing. Avoid excessive vibration — over-vibrating can liquefy the concrete and increase pressure on the foam.
- Monitor wall alignment continuously — have one crew member walking the perimeter checking plumb and adjusting turnbuckles as needed
- Top finish — wall top struck off level for sill plate or anchor bolts; anchor bolts set per spec while concrete is still plastic
- Total pour time — usually 4-6 hours for a typical 1,800-2,400 sq ft home foundation; longer for walkouts
The biggest pour mistake: pouring full-height continuously instead of in 4′ lifts. The accumulated hydrostatic pressure exceeds what the form and bracing can handle, causing wall blow-outs. Major brands publish lift-height limits; respecting them is the difference between a quick successful pour and an expensive emergency.
Embedments and Floor System Integration
7
Embedments and Floor Integration Concurrent with pour or shortly after
Things that need to be embedded in the concrete have to happen during or right after the pour — once concrete cures, you can’t add embedded fastenings without coring.
What gets embedded:
- Anchor bolts for sill plate — set into the top of the wall while concrete is plastic. Spacing per OBC Part 9 (typically 2.4m / 8′ o.c. maximum, closer if seismic or wind design requires)
- Hangers for floor joists — if floor joists bear into wall pockets formed in the ICF, ledger boards and joist hangers attach via concrete anchors after cure
- Beam pockets — for engineered floor systems where steel or wood beams need to bear directly on the wall
- Floor system attachment points — depending on the floor system (wood I-joists, engineered lumber, steel, concrete topping), specific embeds may be required
- Future deck or porch ledger anchors — if exterior deck/porch is in the design, ledger anchors set during pour are far better than retrofit concrete anchors
Floor system integration after wall cure:
- Wood floor system — engineered I-joists or dimensional lumber bear on the sill plate, which is anchored to the top of the ICF wall
- Engineered steel floor — web steel or open-web steel joists bear on top of wall or via pockets formed during the pour
- Concrete floor topping (if specified) — poured separately after wall cure, with appropriate flashing and isolation
Finishing, Waterproofing, and Backfill
8
Finishing, Waterproofing, and Backfill 3-4 days
The work that protects everything you just built. Skip these steps or do them poorly, and the wall’s 100-year service life gets compromised.
What happens (in sequence):
- Bracing removal — after concrete reaches initial set (typically 24-48 hours; longer in cold weather). Don’t rush this — premature bracing removal can cause walls to lean.
- Exterior waterproofing — self-adhesive rubberized asphalt membrane or liquid-applied membrane on exterior foam surface. Critical for below-grade walls. Some brands have specific compatible systems.
- Drainage board / dimple membrane — applied over the waterproofing to allow water to travel down to the weeping tile rather than pooling against the wall
- Drainage tile (weeping tile) — 4″ perforated pipe at footing level, wrapped in filter sock, surrounded by clean stone, draining to daylight or sump pit
- Backfill — clean granular stone (300mm minimum) against the wall, then compacted granular and final native soil to grade. Backfill in lifts compacted to 95% Standard Proctor Density.
- Grading — surface grade slopes at least 5% away from the foundation for the first 1.5m (5′) from the wall
- Underslab insulation and prep — R-10 minimum continuous foam, vapour barrier, slab reinforcement (mesh or fiber). Radon depressurization stub completed.
- Slab pour — 100mm typical residential slab, finished smooth or broom-textured per use
Cold-Weather Installation in Ontario
Ontario’s reality: roughly half of all residential construction happens in conditions where cold-weather concrete protocols apply. Air temperatures of 5°C or below at the time of pour trigger cold-weather concrete requirements per CSA A23.1.
Why ICF actually helps in cold weather
The EPS foam acts as insulation during concrete cure, slowing heat loss from the freshly-poured concrete to the ambient cold. This is genuinely useful — ICF foundations can be poured successfully in colder conditions than open-formed concrete with the right protocols.
Cold-weather adjustments to standard install
- Concrete temperature at delivery — minimum 10°C at the time of placement; warmed water and aggregates from the supplier when conditions warrant
- Concrete admixtures — accelerators (calcium chloride at moderate temperatures, calcium nitrate or non-chloride accelerators for embedded steel structures) to reduce setting time
- Hoarding or enclosures — tented hoarding with portable heaters for sub-freezing pours, particularly for slabs poured below 0°C
- Extended cure time — concrete cures more slowly in cold conditions; bracing removal pushed from 24-48 hours to 48-72 hours or longer
- Backfill timing — allow extended cure before backfilling against cold-poured walls
- Cost premium — typically 10-20% surcharge on cold-weather work due to protection requirements, admixtures, extended schedule
When cold-weather installation makes sense
- Snow belt sites with short building season (Collingwood, Tiny, Wasaga, Blue Mountains) — foundation completed and backfilled by mid-November is the goal; later pours require winter protocols
- Tight schedules — when waiting until spring isn’t an option
- Continuing builds — ICF foundations poured in fall can support framing work over winter
When to wait for spring
- Very cold conditions (sustained below -10°C) where cost premium becomes uneconomical
- Walkout basement walls where exposed foam surfaces will be more vulnerable
- Tight access sites where snow and ice will impede excavation and material delivery
- Small projects where the cold-weather premium outweighs the schedule benefit
Crew Composition and Typical Timeline
Typical crew composition
For a standard Ontario residential ICF basement build (1,800-2,400 sq ft footprint):
- Lead ICF installer (1) — certified ICF builder, responsible for layout, sequencing, quality control. Brand certification (NUDURA Trained Installer, AMVIC Installer Card) preferred.
- Skilled installer (1) — experienced helper for stacking, bracing, rebar placement
- General labourers (2-3) — for block delivery, hod work, site cleanup, supplementary tasks
- Concrete pump operator — from pump truck supplier (separate trade)
- Concrete drivers — from ready-mix supplier (separate trade)
Total typical crew on site: 3-5 ICF crew + concrete pour day adds 2-3 supplier personnel briefly. This is meaningfully smaller than the multi-trade sequence required by conventional concrete + interior insulation buildup, which has been one of ICF’s consistent labour-cost advantages.
Phase-by-phase timeline
| Phase | Typical Duration | Cold-Weather Adjustment |
|---|---|---|
| Site prep & excavation | 1-2 days | Add 1-2 days for snow/frozen ground removal |
| Footings (form, rebar, pour, cure) | 2-3 days | Add 1-2 days for cure extension |
| First course alignment | 1 day | No major change |
| Subsequent courses, bucks, bracing | 2-3 days | No major change |
| Reinforcement (concurrent) | Concurrent | No major change |
| Concrete pour | 1 day (4-6 hours) | Same pour duration; additional setup for hoarding/admixtures |
| Bracing removal & embedment finishing | 1-2 days | Extend to 2-4 days for cure |
| Waterproofing, drainage, backfill, slab | 3-4 days | Add 1-2 days for cold weather protocols |
| Total (typical basement) | 1-2 weeks | Add 1-2 weeks for cold weather |
| Walkout basement | 2-3 weeks | Add 1-2 weeks for cold weather |
Common Installation Mistakes to Avoid
30 years of pouring ICF in Ontario teaches you what fails. Here are the recurring mistakes that cost the most money and time to fix — and how to avoid them:
Sloppy first course
Out-of-square or out-of-level first course compounds upward. Spend extra hour here; save day later. Verify diagonals before stacking second course.
Insufficient bracing
Bracing at >1.2m spacing or weak turnbuckles can’t resist concrete pressure. Result: wall blow-outs or out-of-plumb walls that have to be torn down.
Full-height continuous pour
Pouring full wall height in one continuous lift exceeds form pressure ratings. Always pour in 4′ (1.2m) lifts with brief pause between.
Misaligned dowels
Footing dowels placed off the vertical rebar grid mean field bending or splicing. Verify dowel placement matches wall reinforcement spec before footing pour.
Service penetrations after pour
Electrical, plumbing, HVAC penetrations after concrete cures require coring — expensive and disruptive. All penetrations installed during stacking.
Skipping taper top blocks
Last course without taper-top results in concrete in interlock + uneven wall top. Adds chipping/grinding time and complicates sill plate connection.
Inadequate waterproofing
Skipping or under-applying exterior waterproofing trades short-term savings for long-term basement moisture problems. Don’t.
Premature bracing removal
Removing bracing before concrete reaches initial set (24-48 hours typical, longer cold weather) lets walls drift out of plumb. Wait the cure time.
Wrong concrete slump
Concrete too stiff (under 150mm slump) honeycombs at rebar; too wet (over 200mm) increases hydrostatic pressure. Aim for 150-200mm for ICF pours.
The installer experience question that matters most
ICF installation isn’t difficult once you’ve done a few. The difference between a smooth install and an expensive disaster is usually installer experience with the specific brand and the specific application. NUDURA Trained Installer certification and AMVIC Installer Card programs both signal genuine experience. Ask any prospective ICF contractor: how many builds with this brand, in this core width, in conditions like this site? The right answer is meaningful experience — not their first attempt.
Related ICFpro pages
More on ICF foundations, blocks, code, cost, and what to ask before hiring.
★ Foundation pillar
Complete ICF Foundation Guide →
★ System primer
ICF Building: Complete Ontario Primer →
Service
ICF Installation & Supply Service →
Reference
ICF Blocks: All Types & Variants →
Products
ICF Forms for Basements →
Systems
ICF Wall Systems: Flat vs Grid vs Post & Beam →
Brand
All 8 Ontario ICF Brands Compared →
Code
ICF & the 2024 Ontario Building Code →
Cost
ICF Cost Per Sq Ft Ontario 2026 →
Structural
ICF Lintel Design Guide →
Structural
ICF Structural Strength →
Brand
NUDURA Installer Ontario →
Energy
ICF Energy Efficiency →
Decision
Is ICF Worth It in 2026? →
Service
ICF Custom Home Building →
Ready to Install ICF on Your Ontario Project?
We’ve been pouring ICF in Ontario for 30 years (since 1995) — foundations, walkouts, custom homes, garages, additions, commercial. 300+ projects, four certifications (Certified ICF Builder, R2000, Green Builder, Tarion-Approved), 7-year warranty. We handle the entire install sequence from excavation to backfill. No-cost initial conversation, plan review, and ballpark quote.
FAQ: ICF Installation
How long does ICF installation take?
For a typical Ontario residential basement (1,800-2,400 sq ft footprint, 8 ft walls), the complete on-site installation from excavation to backfill-ready runs 1-2 weeks. Walkout basements add 1-2 weeks. Cold-weather construction adds 1-2 weeks for concrete curing protection and protocol adjustments. Permit and design phases run separately, typically 2-6 weeks ahead of break-ground.
What crew size is needed for ICF installation?
Typical Ontario residential basement crew: 1 lead ICF installer, 1 skilled installer, 2-3 general labourers — total 3-5 on site for stacking and pour days. Concrete pump operator and concrete drivers from supplier add 2-3 personnel briefly during pour day. This is meaningfully smaller than the multi-trade sequence required by conventional concrete + interior insulation buildup, which has been one of ICF’s consistent labour-cost advantages.
How high should each concrete lift be during the pour?
4 feet (1.2m) lifts are standard for Ontario ICF installation. Each lift is allowed to begin set before the next is added — this manages the hydrostatic pressure on the foam. Skipping this rule (pouring full-height continuously) is the most common cause of ICF wall blow-outs. Major brands publish lift-height limits in their technical literature; respecting them prevents expensive emergencies during the pour.
What concrete spec is used for ICF installation in Ontario?
Standard Ontario residential ICF: 25-30 MPa concrete per CSA A23.1 (above OBC Part 9 minimum of 20 MPa). Slump 150-200mm — flowable enough to fill the form without honeycombing, not so wet that hydrostatic pressure deforms the foam. Aggregate size 10-14mm. Air entrainment 5-8% for freeze-thaw resistance. Cold-weather concrete protocols (warmed water/aggregates, admixtures, extended cure) when ambient temperature below 5°C.
What rebar is used in ICF installation in Ontario?
Canadian rebar per CSA G30.18: 10M (11.3mm), 15M (16mm), 20M (19.5mm). Standard Ontario residential ICF reinforcement uses 15M @ 600mm vertical and 15M @ 400mm horizontal, with additional bars at openings. Concrete cover from rebar surface to wall face: 40mm minimum per CSA A23.1. Engineered designs (walkouts, taller walls) may specify 20M or tighter spacing per CSA A23.3.
Can ICF be installed in Ontario winters?
Yes, with caveats. The EPS foam actually helps cold-weather concrete curing by insulating the concrete from ambient cold. Successful pours have been done at -10°C and colder with proper protocols: warmed concrete (10°C minimum at placement), concrete admixtures (accelerators), heated enclosures for sub-freezing slab pours, extended curing time (48-72 hours bracing wait), and a 10-20% cost premium. Sustained conditions below -10°C may push the schedule to spring. Snow belt sites typically have foundations complete and backfilled by mid-November to avoid heaviest winter conditions.
How critical is the first course in ICF installation?
Extremely critical — the first course sets the alignment for the entire wall. Any out-of-square or out-of-level error in the first course compounds upward through every subsequent course, requiring corrective shims or rip cuts that slow the install and can affect structural and aesthetic quality. Spending an extra hour getting the first course right typically saves a full day later. Verify diagonals before stacking the second course.
When does ICF installation require an engineer?
OBC Part 4 / CSA A23.3 engineered design is required for: walkouts, basement walls over 9 ft tall, multi-storey above-grade, any condition exceeding Part 9 prescriptive limits, commercial work, retaining walls over 1.2m of retained soil, and unusual structural conditions. Most single-family residential basement construction can use OBC Part 9 prescriptive tables without engineered design.
What 2024 OBC requirements affect ICF installation?
The 2024 OBC (O. Reg. 163/24, in force Jan 1, 2025) introduced several requirements that affect ICF installation sequence: radon rough-in (sub-floor depressurization pipe installed during slab pour stage, mandatory for all new homes); full-height basement wall insulation (automatic with ICF); Mechanical Ventilation Design Summary (MVDS) at permit application; tighter SB-12 energy performance (ICF easily meets); frost depth requirements (1.2m minimum, 1.4-1.5m in Georgian Bay snow belt areas).
What are the most common ICF installation mistakes?
Top recurring mistakes: (1) Sloppy first course alignment compounds upward; (2) Insufficient bracing can’t resist concrete pressure; (3) Full-height continuous pour instead of 4′ lifts causes blow-outs; (4) Misaligned dowels require field bending; (5) Service penetrations after pour require expensive concrete coring; (6) Skipping taper top blocks creates uneven wall top; (7) Inadequate waterproofing trades short-term savings for long-term moisture problems; (8) Premature bracing removal lets walls drift out of plumb.